BENV 1010
In class Activities:
Individual Donald Trump - Photoshop:

Week 2 studio Activities
Task 1) In your groups come up with 3 words to describe each data set. (For data sets see moodle week 2)
The 3 words for the weather = Impactful, volatile, transformative
Task 2) Download an evocatively coloured image from the internet that communicates each word
 |
| impacful |
 |
| Volatile |
 |
| Transformative |
Task 3) Download Adobe Capture for your phone and use it to create swatches from the images you downloaded in step 2.
Individual Weather Graph - Illustrator
ON SITE
1) Find and photograph an example of all of the following deliberately used Design Elements and Principles on your site: (G15 on UNSW )
 |
| Lines |
 |
| Balance |
 |
| Shapes (Geometric) |
 |
| Proximity |
 |
| Direction of lines |
 |
| Alignment |
 |
| Size & Scale |
 |
| Repetition & Pattern |
 |
| Texture |
 |
| Contrast |
 |
| Colour |
 |
| Space |
In your group find and photograph an example of at least 20 of these Built Environment specific words: (I Had these 5)
 |
| Pathway |
 |
| Street Furniture |
 |
| Edges in Landscaping |
 |
| Raised Bed |
 |
| Tree Canopy |
Week 3 studio Activities
Task 1) In class drawing activity Setting up a diagram, key elements and fonts. Technical Drawings: Plans Sections, Elevations and Scale Using figures to indicate Scale

 Task 2) Onsite Activity
Measuring the site and recording it using graph paper and a pencil
Tracing user experience in the site using video
(Video is a great way to document patterns of how people use the spaces you are
analyzing. Look for the patterns of use, do people only use one side of a stair well? Do
they always cut through a garden and ignore the designated path?)
 Sketches of Area in the group:
Individual Map Piece of UNSW F15
Studio Activities Week 4
Sketch of Site Area

From this photo
Individual Analogue Piece:
Group Assessment:
Part 1
Part 2
Part 3
Part 4
Week 5 Online Tutorial: 2.5d Shapes and Assemblies
My design : This is the model on Fusion 360


Folding Paper Shapes:


Paper version of study space:
Findings of paper V cardboard = i found cardboard much easier to form in terms of walls for the structural integrity of the buildings. However, when making twists, paper was much easier as i could influence it quicker as it held in its position when being creased
Process of paper V cardboard:
The dimensions of the 1:20 scale is:
Floor: 15cm x 16cm
Walls: (15cm x 11cm) x 2 + (16cm x 11cm) x 2
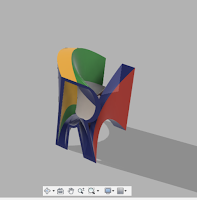
Week 7 Fusion Activity (Making 3 initials of my name), in this case 'RLH'


Week 7 Studio Activities
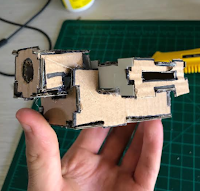
'Model 2' - Making the model of 2.5d Shapes and Assemblies cardboard. As seen here:
 |
| 1) The design i built |
 | |
|
 |
| 3) The final product (With 2 coats of white paint) |
Analysis - i experimented making the object out of paper and holding it together via staples (as glue didn't work), however, this became achievable as the paper creased and destroyed its ability to stand up. So i restarted using cardboard which was still frustrating to work with, but it still performed its function to hold together successfully with glue. I then painted it. which gave a better overall texture to the cardboard cardboard pieces, aswell as holding it together stronger than the glue.
After consulting with my tutor, it was discussed that i was best to make a design using the folding tongue technique. This is as shown here:

Week 7
Model 1: Iterative Model with an additional source of natural light at a new scale
The Human Figure:
Week 8 - Lecture Activity:
Design 1: - Plastic acrylic - easy to see with the vibrant colours
Design 1: - Plastic acrylic - easy to see with the vibrant colours
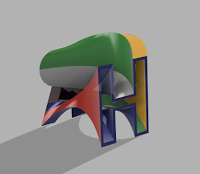
Design 2: Wood and Granite - As seen here they are softer materials than the previous design, which is easy to the eye

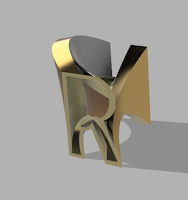
Design 3: Gold, Copper & Silver - This is my final design, i wanted to show the spark of the materials, hence displaying the bling of the design with the reflective bling

Week 8 - Tutorial Activity (The 3 Photo-shopped house images)
Image 1:
 |
| Original image i used |
 |
| Image used (Fiordland National Park-photo i took last year) |
 |
| Finished Photoshop |
Materials: Wood, Stone, wooden door, metallic window
Justification: I photo-shopped this image as the shadow-line of the white colour of the roof ties in with the clouds in the skyline and the snow in the distance on the mountains giving it a sense of belonging. Furthermore, the wooden exterior tied in with the stone side exterior highlights the material choice that is found in such parts of the deserted natural environment. This enables the responder to feel immersed within the design, provided they know what materials exist in the remote NZ environment.
Image 2:
 |
| Original Image of the rockfront |
 |
| Nz Image of Queenstown rural area |
 |
| Finished Photoshop |
Justification: The image clearly represents the elements found in such an environment as rural NZ, as the rock wall is complimented by the pool, representing the lush and green environment of the secluded setting. Furthermore, the rock wall gives an insight into the dull skyline with the heavy clouds overlooking the setting, whilst the shadow patterns from the pagola onto the pool demonstrate the sun gradually appearing above the image taken.
Image 3:
Image 3:
 |
| Background Image of NZ's Milford Sounds |
 |
| Finished Photoshop |
Materials: Bamboo, arched window frame, thin in-house window frame
Justification: I decided to use such materials as it suited the element of the photo. These materials are suiting to the natural environment as their colour transition has little impact on the overall setting of the image, also the use of materials that are commonly found it the landscape provides the image with a sense of belonging.


Comments
Post a Comment